Home » Circuits
LED Lighting For Dual-Filament Lamps
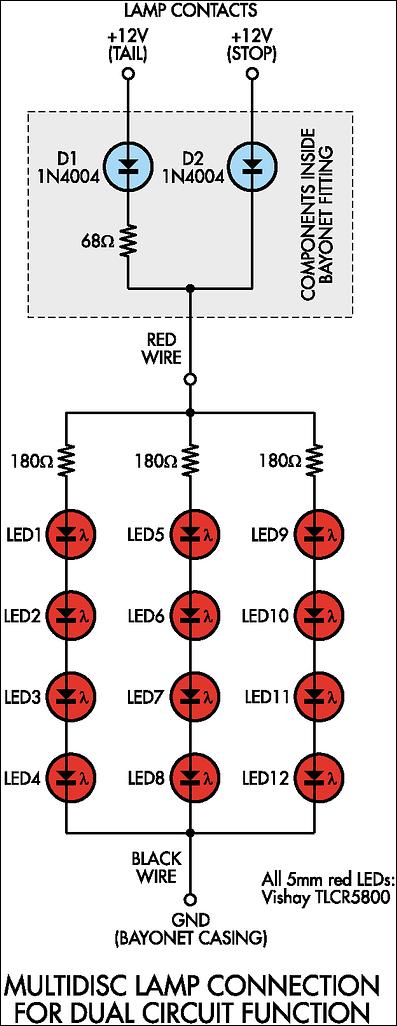
Before we describe how it's done, note that we recommend that the result be checked as having sufficient brightness for a stop & tail-light application. That's because the light output may be inadequate, depending on the tail-light lens and reflector assembly - so use any modified lamps with discretion! As shown, an additional diode (D1) and resistor (68W) provide power from the "tail" circuit. Alternatively, when the "stop" circuit is powered, the resistor is bypassed by D2, thus increasing the LED current and the light output.Circuit diagram:
Modifications to the lamp assembly instructions are as follows:
- After soldering in the copper tube but before soldering the platform board to the bayonet lamp base, the three components inside the dotted box must be wired up inside the base.
- The anode leads of the diodes can be soldered directly into the contacts ("bumps") on the base (a fine file or glass paper may be needed to get a nice round shape). Everything must be insulated (use heatshrink tubing).

